The below pictures show the step by step guide which I used to help me with the process.
1) Open the file and select IMAGE>ADJUSTMENTS>DESATURATE to remove all colour from the image. Please note that the file is still RGB. We must not turn the colour mode to Mono or the next bit won’t work.

2) Select the History Brush from the tool palette (2a). Then make your brush size around 10 – 11 px using the palette located just under the file menu bar (2b). Hardness should be 100%.

3) Using the History Brush we can now “paint” back in time to when our image was in it’s full colour glory. Remember and lift off now and then so you can undo any mistakes without having to start again.
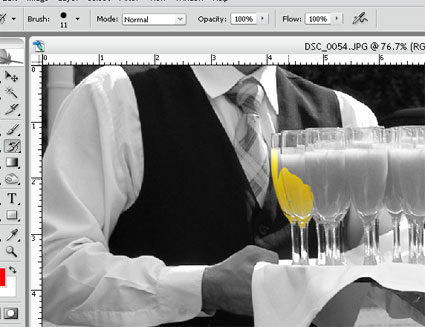
4) Continue the process until the area is complete. Take extra special care by zooming in when necessary. I found the area near the ladies hand needed this treatment.

And that’s it!
The secret is just to take your time during the painting process and be careful around the edges. Use any size of brush (and indeed, more than one size) for each job that you are comfortable with.
Read more: http://www.digital-photography-school.com/mono-with-a-dash-of-colour-photoshop-cs2-tutorial#ixzz1jzZ9AoyN
No comments:
Post a Comment